5 Unconventional Jewelry Making Tips
![]() Who doesn’t like a clever trick for getting something done better, faster, with less mess, etc. Below are 5 unconventional jewelry making tips collected from around the web.
Who doesn’t like a clever trick for getting something done better, faster, with less mess, etc. Below are 5 unconventional jewelry making tips collected from around the web.
1. Make Your Own Lemal Trap (lemal is the sawdust-like shavings left over from cutting metal)
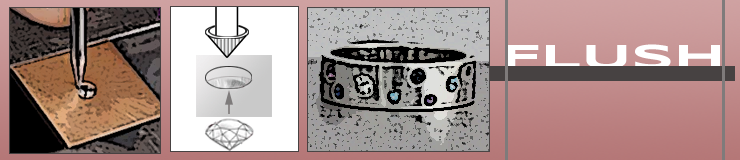
2. Using an engraving block/ball for setting stones
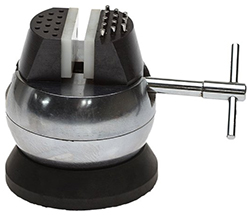
I was lucky enough to take a flush setting class with Michael David Sturlin. I loved the use of the engraving ball as a tool for securing the piece as well easily rotating it to different angles. The quote below is from an article he wrote about this for The Ganoksin Project: Stone Setting Considerations
One of the most important tools used in stone setting is an engraver’s ball. Also called an engraver’s block or setter’s block. This device is a heavy metal sphere which opens and closes like a vise. The sphere is divided in two halves, a top and bottom, which allows the top half to rotate while the bottom remains stationary. … The main feature of the engraver’s ball is that it allows the work to be secured in place and held in a steady immobile position.
3. Better Drilling in Plastics
Answer to a question in a Q&A in American Woodworker Magazine on how to modify drill bits to better drill through plastics.
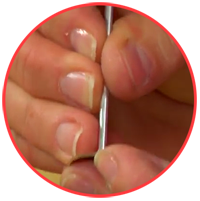
4. Stop sanding off your finger tips!
Contenti.com keeps a tips and tricks archive. Here’s a good one: “Save Your Fingers From Sanding”:
To make sanding very small pieces of metal easier, use peel-off adhesive foam as a backing. Simply cut a piece of foam the size of the metal piece to be sanded and then stick the metal to the foam (with the side that needs sanding facing up). When you flip the piece over to sand, you have something to hold onto and keep your fingers from being sanded along with the metal. When you’re finished simply peel the foam off the metal.
Submitted by: Karrie King
5. Easy paper removal — image transfers on polymer clay
Ever wrestle with removing the paper stuck to a polymer clay piece after an image transfer? This tutorial on Col’s Creations blog talks about using Avery® T-shirt Transfers paper for Inkjet Printers 8938. This is indeed the method I use and I believe the transfers are also very vibrant and sharp versus other methods I’ve tried.