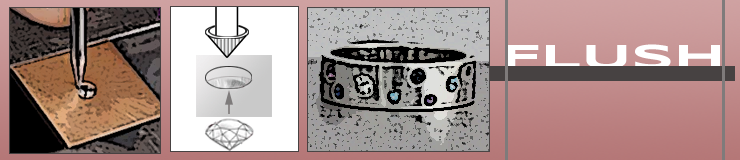
Flush Setting Stones
![]() I like the look of flush setting on modern pieces. If well placed on the metal piece, it is very clean and elegant, although as Alan Revere says in his tutorial on flush setting stones, “This is either the easiest or most difficult setting of all. As simple as it looks and as captivating as it appears, the flush setting is either a dream or a nightmare.”
I like the look of flush setting on modern pieces. If well placed on the metal piece, it is very clean and elegant, although as Alan Revere says in his tutorial on flush setting stones, “This is either the easiest or most difficult setting of all. As simple as it looks and as captivating as it appears, the flush setting is either a dream or a nightmare.”
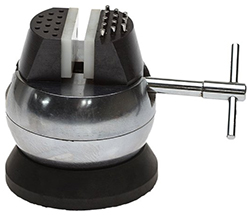
I was lucky enough several years ago to take a faceted stone flush setting class with Michael David Sturlin. His method uses an engraving ball as the holding device (instead of a vise) which allows you to get at all angles easily. The ball sits in a cradle that allows it to be positioned just about every which way. It’s certainly not the only way to secure your piece while you work (as you will see in the links to tutorials below) but I think it’s ingenious and helps minimize mistakes.
After the setting was secure Sturlin used a graver to make a bright shiny halo around the stone. This requires a steady hand and lots of practice to avoid scratching metal and/or stone. He also showed us how to make our own setting tool (small/short steel rod) if you needed to coax the setting a little with a hammer.
 What is flush setting some of you may ask. Flush setting, also called gypsy setting, is a method of securing stone to metal by precisely drilling, burring and burnishing. The result is the illusion of the stone’s top being exactly even with the top of the metal, almost as if it were floating. After drilling a hole and working with burs to get the correct depth for the setting, a tiny bit of metal is “pushed” around the stone’s girdle (the girdle is the widest part of the stone) using a pointed steel burnisher. When done correctly, this secures the stone without prongs, glue, etc.
Flush setting is limited to harder stones that can stand up to it such as diamonds, rubies, and CZ’s (cubic zirconia). The burnisher is steel so sticking with stones that are at least an 8 on the Mohs Scale is a good rule of thumb (when I was learning I used suitably hard lab grown gemstones because I had them sitting around in a metal clay tool kit. If you don’t have anything like that, I’d recommend starting with CZ’s.)
The thickness/gauge of the metal is also an important consideration; it must be deep enough to fit the stone plus a little extra so that the stone’s culet (pointed part) doesn’t poke into the wearer’s skin. Hauser & Miller’s metal sheet page is a nice guide to use as it shows the milimeters of each gauge (e.g., 16 gauge is equal to 125mm).
Flush Setting Tutorials
- Flush Setting Stones — Alan Revere
- How to Flush Set Stones “silvertinkerer” on Instructables.com
- Flush Setting Faceted Stones — Nancy Hamilton
- Basic Gypsy or Flush Mount Setting — Charles Lewton-Brain
- Flush Setting Stones — Louise Little
- Resource/Free: Interweave Free Guide: 8 Stone-Setting Techniques You Need to Know
- Resource/Free:
 170 Best Images About Stone Setting Techniques